Dissent: Cardigan Hack
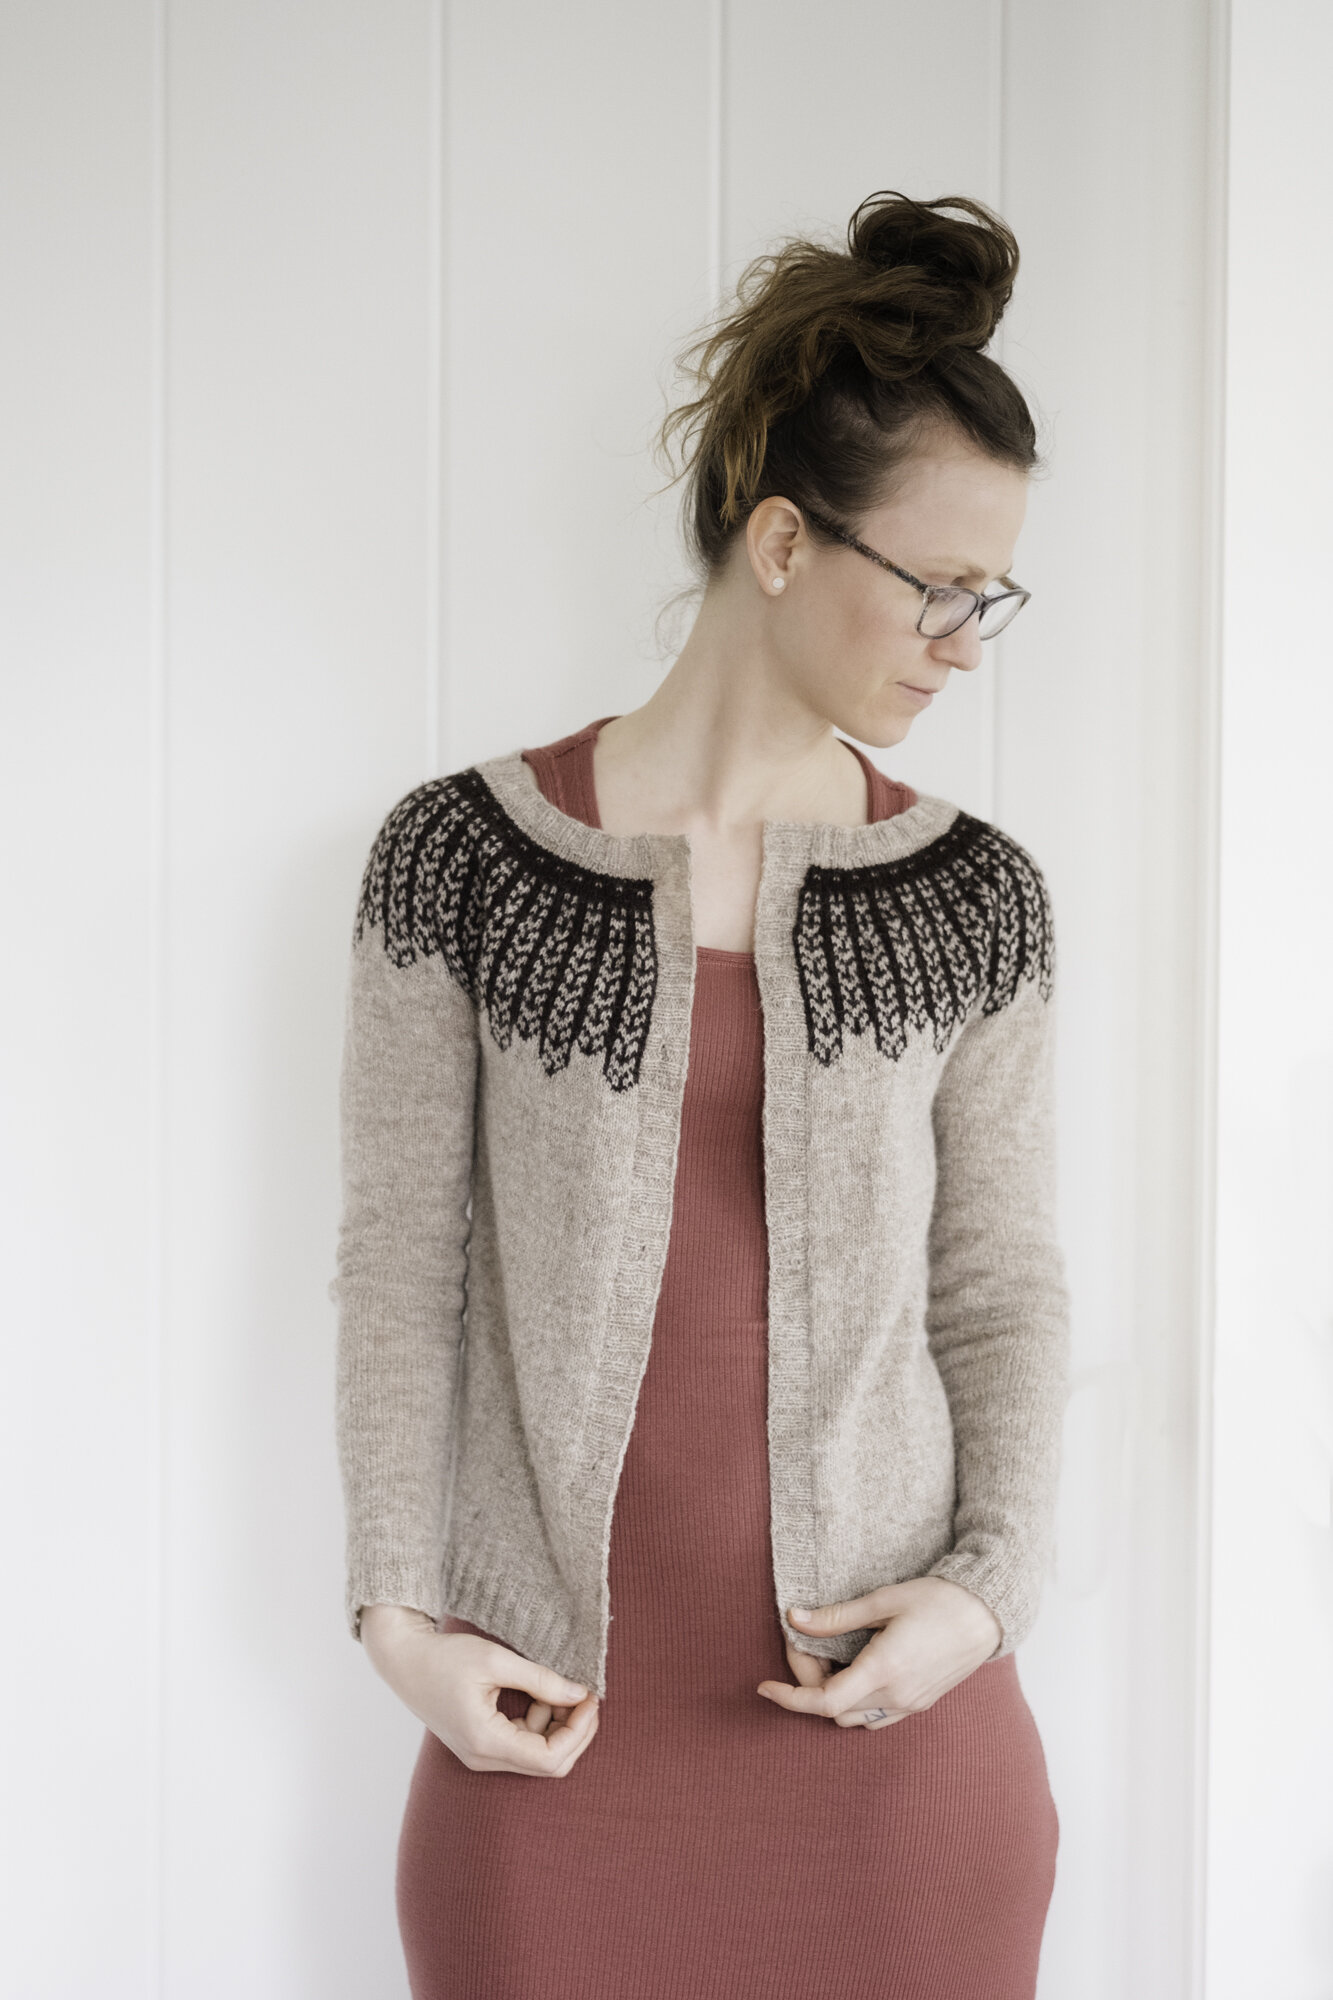
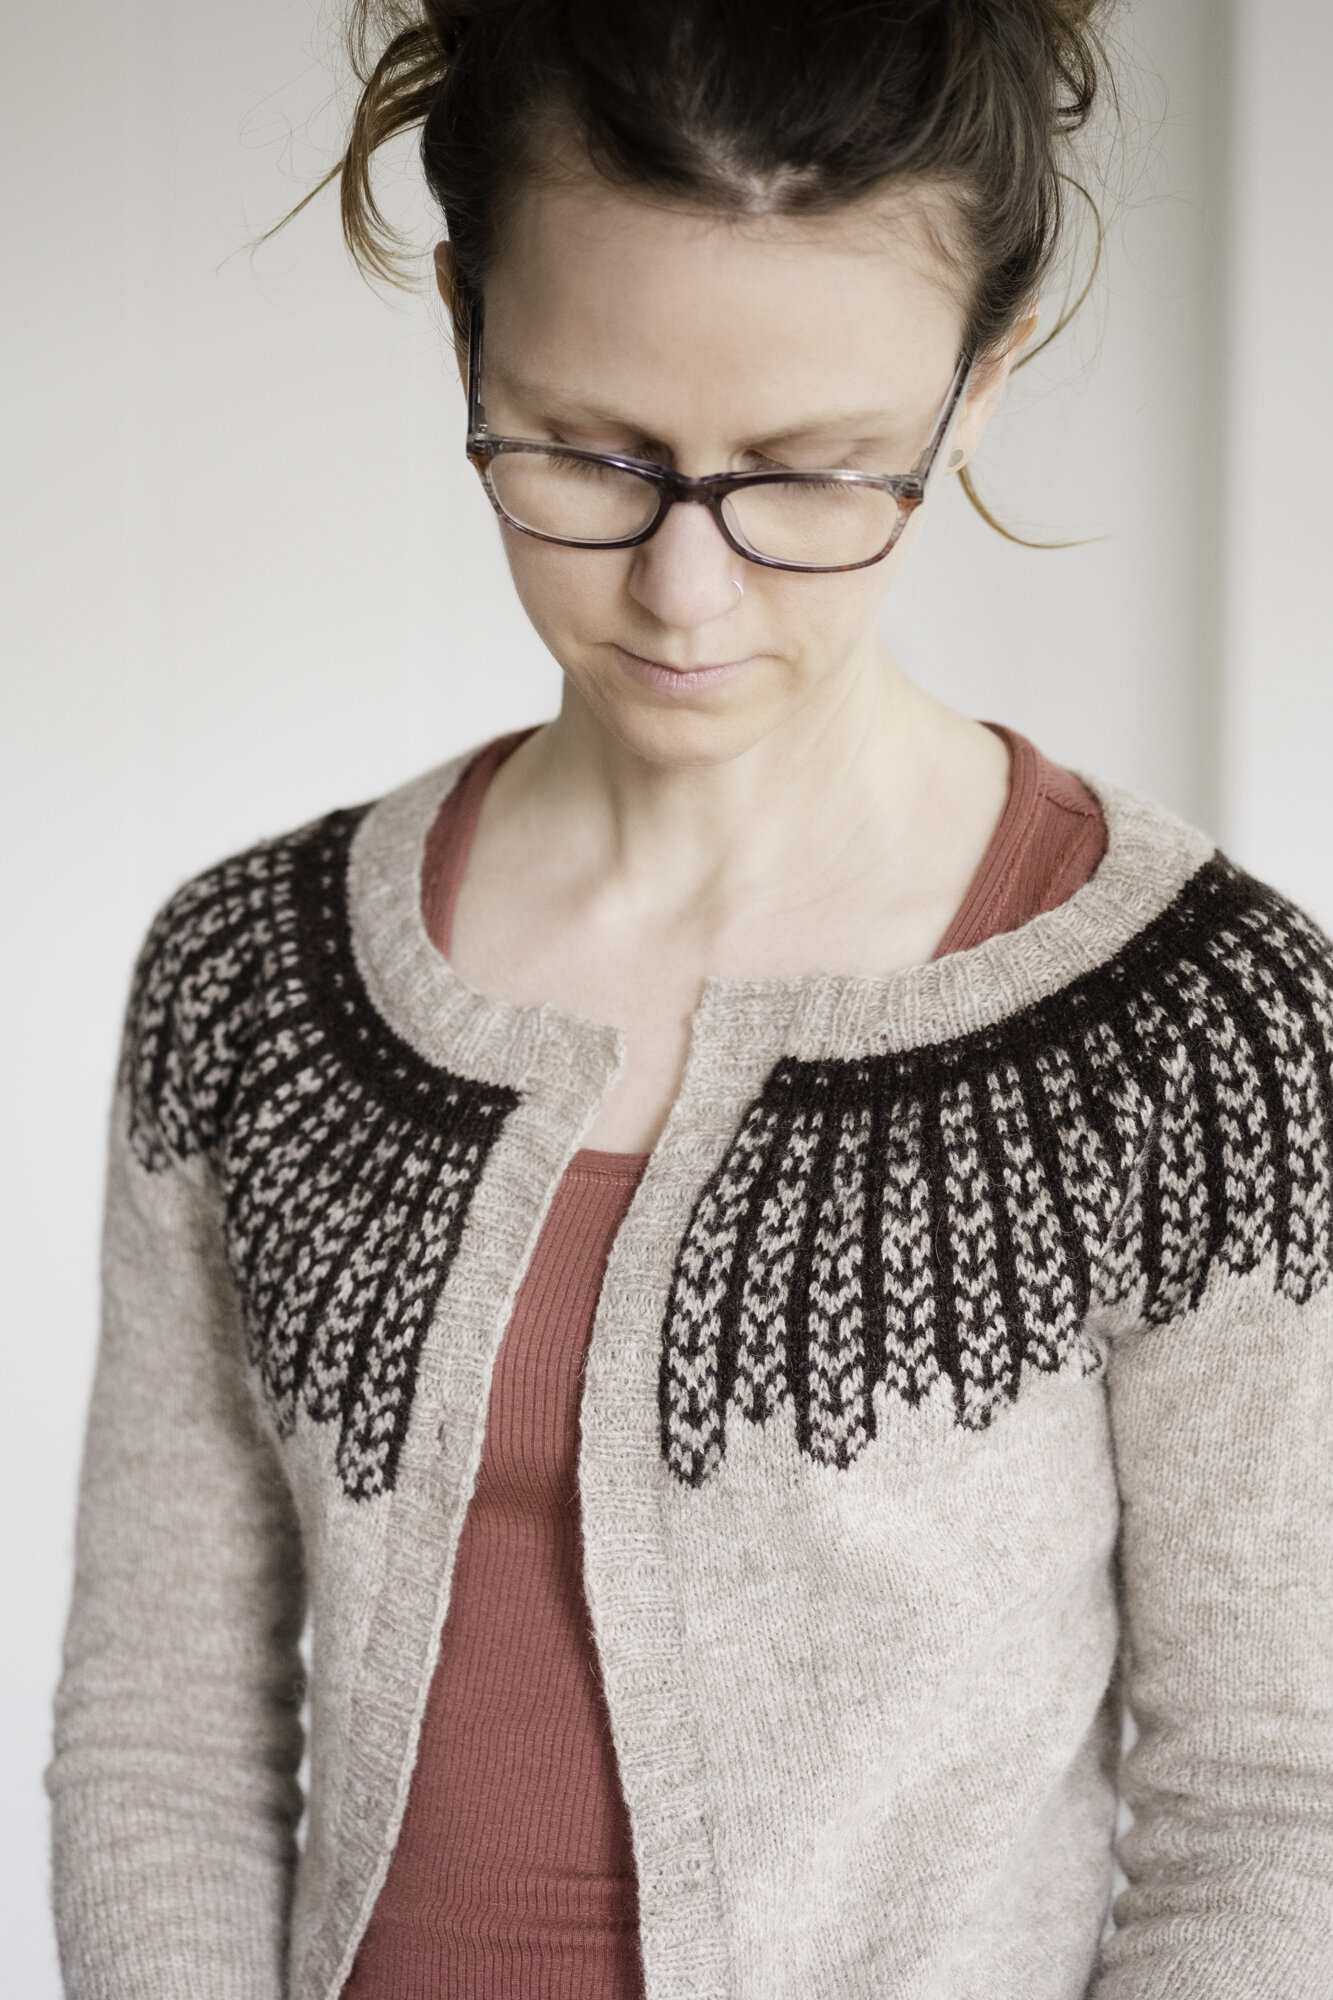
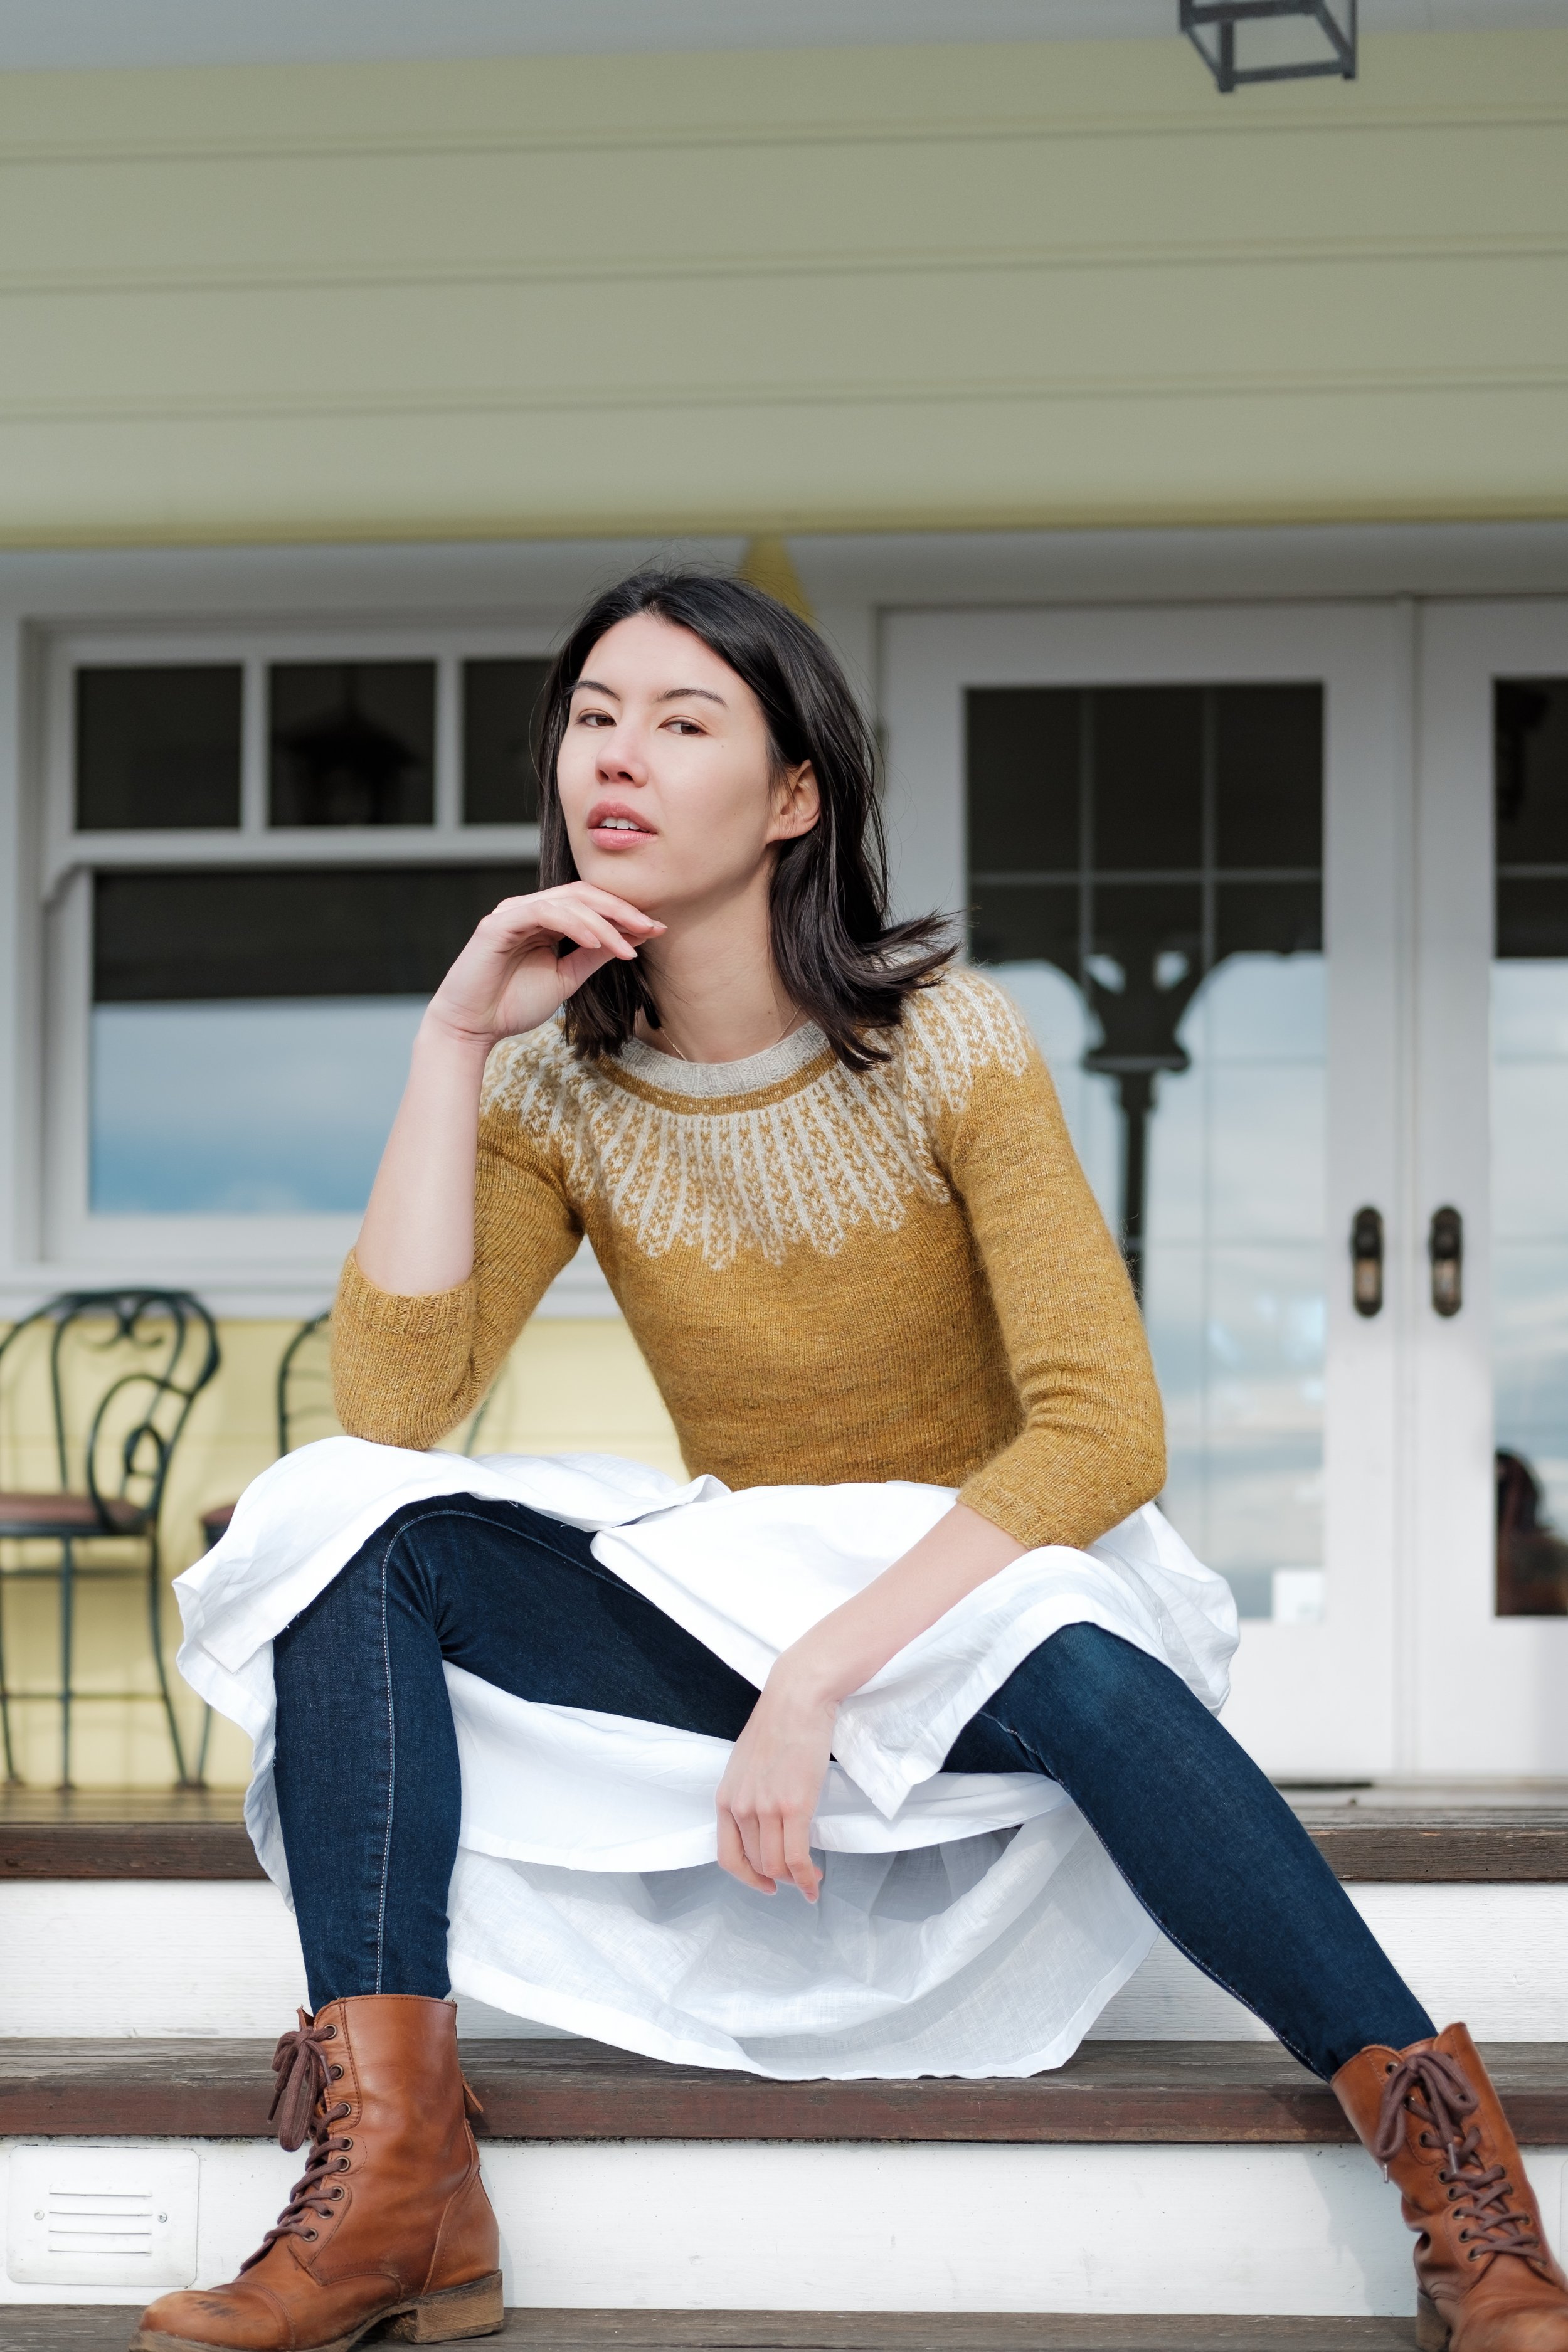
My original Dissent sweater was a cardigan and I wrote a hack on how to make it into a pullover, so I have to write a hack for turning the pullover into a cardigan too! You can see my project on Ravelry.
I sometimes like writing hacks rather than completely separate patterns so that it’s easy for you to make the garment you want and you’re able to learn a little bit about sweater construction. I hope this method empowers you to try hacking other sweater patterns too.
I made mine out of Jamieson’s Ultra in the smallest size. I still haven’t been able to find buttons I like, so my cardigan is still button-less, but I hope you get the idea anyway. If you’ve got a good online source of buttons in Canada, please let me know in the comments!
DISSENT CARDIGAN HACK
These instructions will help you use the Dissent Pullover pattern and alter it to make a cardigan. You’ll need the pattern to use this hack. Also you should know that this hack employs a steek, which is a 5-stitch panel of extra stitches where you will cut your sweater open. With scissors. You can do it!
To make Dissent Pullover into a cardigan, you’ll need to make a few important changes:
The beginning-of-round will be at the centre front rather than centre back.
We’ll add a 5-stitch steek panel between the beginning and end of the round so we have a spot to cut and some buffer stitches on either side of the cut. (Add 5 to the CO number.)
We need to have 2x2 ribbing for the neck band that begins and ends in “k2” for symmetry, so we’ll subtract 2 from the pattern’s cast-on number to get a multiple of 4+2, rather than just a multiple of 4 that the pullover pattern has. (This isn’t counting the steek panel.)
We’ll need to start the colour work section with 3 fewer stitches than in the pattern so that the final motif of the round is just a half, making it symmetrical with the first motif of the round. To make that happen, we’ll adjust the number of stitches we increase in the Shape Yoke section.
The steek panel will always be knit stitches. Any time you’re working with two colours during the same round, you’ll end that round by alternating the colours across the steek panel so that you have vertical stripes — MC, CC, MC, CC, MC. Whenever you’re working single-colour rounds, just knit the 5 steek stitches using whichever colour you’re currently knitting with.
Making your pullover into a cardigan isn’t terribly complicated, but there are a lot of words here. I suggest getting it all figured out before you cast on so there aren’t any surprises.
CAST ON
To figure out your cast-on number, start by adding 3 to the CO number for your size in the pattern. (Doing this takes away 2 stitches so that you have a multiple of 4+2 instead of just a multiple of 4 for your ribbing, and adds the five-stitch steek panel.)
For example, I want to make the size 41”/104 cm, which calls for casting on 144 stitches. My math was 144 + 3 = 147 so I’ll cast on 147. That gives me 5 steek stitches and 142 ribbing stitches, a multiple of 4+2, so I can begin and end my round (aside from the steek panel) with k2.
NECK BAND RIBBING
Once we’ve cast on, we’ll work 2x2 rib as written, but when you get to 7 stitches before the end of the round, k2, place a marker, and k5 for your steek panel. These five stitches will be your steek throughout the project. Don’t ever do any shaping within this panel. Your beginning-of-round marker is at the centre front, just following your steek panel.
SHORT ROW SHAPING
It’s important that the deepest part of your short row shaping is at the centre back, so here’s how to do that when your BOR marker is at the centre front.
Place a removable marker at the halfway point of your round, not counting the steek stitches. In our example, we have a total of 142 stitches, not counting the steek panel, so your marker will be placed after 71 stitches. This is your centre back.
Knit to removable m. Now follow the instructions for the short row shaping in the pattern, beginning with Short Row 1. Treat the removable marker you placed as if it’s the BOR marker, just for this section. Once you’re finished you can just remove the removable marker and continue on.
SHAPE YOKE
When you work Increase Round 1, you should increase the same number of stitches listed, but because you’re starting with a different number of stitches, you won’t be able to follow the exact instructions given in the pattern. Here’s a link to a calculator I use all the time to increase evenly. I’m giving you that instead of writing out all the instructions, so you get the chance to try it out and see how you can use it for other things.
To use the calculator, enter your total number of stitches in the first box (not including the steek stitches, as you’ll always want to keep those separate and won’t ever do any shaping in that 5-stitch panel.) Then enter the number of stitches you need to increase in the second box. Just hit enter and the calculator will do its work, filling the third box with the number of stitches you’ll end up with after finishing the increase.
Below the three white boxes you’ll find two options — Unbalanced and Balanced. Unbalanced is simpler, but Balanced makes it more symmetrical. I usually choose Balanced, but you can use whichever you prefer. Then just follow the instructions.
For my example, I had 142 stitches (again, not counting the steek panel) and I needed to increase 24 stitches. So I entered 142 in the first box and 24 in the second box. After hitting return/enter, the third box said 166, which will be my new stitch count after I complete the increase round.
My Example Increase Round: K2, (M1, k6) 11 times, M1, k5, (M1, k6) 11 times, M1, k3
When we finish the next increase round, we need to end up with 3 fewer stitches than it says in the pattern. That’s because the Charts begin with a multiple of 6 stitches, but we need to end up with a multiple of 6+3 in order to make our motifs symmetrical. That means we’ll end with a half-motif. (It won’t seem like a half-motif really because until near the end of the chart, the first and second halves of the motif are the same, but it will matter when you get to the part where one spike continues on and the other one ends.)
Now you’ve already got 2 fewer stitches than the pattern called for in order to make your ribbing be a multiple of 4+2, that means, you need to add just one fewer stitch in this second increase round in order to come up with a multiple of 6+3 (3 fewer stitches than the pattern calls for.)
So instead of following the pattern after switching to the Main Colour, increase 9(15, 20, 23) [27, 34, 38, 39] (40, 50, 54] in Increase Round 2. (That’s one less than the pattern calls for.) Use the calculator linked above to help you do it evenly. You should then end with 153(165, 183, 189) [201, 219, 231, 237] (243, 267, 279) sts, 3 fewer stitches than in the pattern.
In my example, I had 166 stitches (not counting the steek stitches) when I began the round, so I input 166 into the top box of the calculator. I need to increase 23, so I input 23 into the second box and hit return. The third box will populate with 189, showing the number of stitches I’ll have after I finish the increase round. I then followed the Balanced instructions:
My Example Increase Round: K3, (M1, k7) 9 times, (M1, k8) 5 times, (M1, k7) 8 times, M1, k4
Knit the plain rounds as given in the pattern.
COLOURWORK
We can work the Yoke as written, except that we’ll work the 6-stitch pattern repeat 25(27, 30, 31) [33, 36, 38, 39] (40, 44, 46) and a half times.
Because we skipped that half-motif, we also didn’t increase the 4 stitches that we would have if we had worked it. So we started the charts with 3 fewer than in the pattern and we skipped increasing 4 stitches. That means we’ll end the colour work with 7 fewer stitches than given in the pattern (plus our 5 steek stitches.) When we finish our colourwork we should have (not counting the steek stitches) 357(385, 427, 441) [469, 511, 539, 553] (567, 623, 651) stitches.
In order to get the actual desired number of stitches for the bust, we’ll need to increase more in the final increase round. In the pattern, the back has an odd number of stitches, but I want that to be even because my plan is to just switch “back” with “front” when we’re following the instructions for dividing for the body and sleeves, and while I didn’t mind the Back being 1 stitch off in the pullover, I really want my fronts to have the exact same number of stitches.
So we’ll increase the number of stitches given in the pattern plus 7 that were missing from the cast-on and colour work increases, plus 1 to make the fronts even, so a total of 8 extra. That means we’ll end the final yoke increase round with one more than is listed in the pattern.
Increase 14(18, 10, 14) [18, 8, 14, 18] (36, 12, 18) sts in final increase round. We’ll have 371(403, 437, 455) [487, 519, 553, 571] (603, 635, 669) stitches after increasing (not including the 5-stitch steek panel).
DIVIDE FOR BODY & SLEEVES
Remember you’re starting at the centre Front and just follow the instructions for the Dividing Rnd, except that you’ll end with one extra stitch so that the fronts match (plus, of course, your steek panel). Because your beginning-of-round is at the front, not at the back, you can just switch the word “back” with “front” in your mind when you see it and vice versa.
When you rejoin for working in the round, you’ll have all your Body stitches in place. Your Body should have the stitch count listed in the pattern plus 1. You can just follow the instructions for the Body Shaping as given in the pattern, keeping that extra stitch in mind when you look at stitch counts.
HEM
You’ll need a multiple of 4+2 stitches for the hem (plus your 5 steek stitches, which don’t count towards that), so for all sizes and for both cropped and standard length, just increase one stitch in your final knit round before beginning the ribbing.
Work 2x2 ribbing, beginning and ending with k2, and knitting the 5-stitch steek panel as usual.
SLEEVES
Work the sleeves as given in the pattern.
FINISHING
I’ll share a detailed sewing machine steek tutorial in the next segment and you can see videos of the crochet method here, but if you don’t need all that, I’ll just give the short version here.
To finish your sweater, mark the centre front with a line of basted stitches. You may also want to baste lines on either side of your 5-stitch steek panel to guide you when picking up stitches. Weave your ends in away from the centre so they don’t end up getting cut. It’s very tempting to think you’ll do this later, but what will really happen is that you will cut your ends too short while you’re cutting your sweater open, so don’t skip this step. Weave in your ends now. My preferred method for weaving is ends is duplicate stitch on the WS.
Reinforce your steek on both sides of the centre line either using a sewing machine or the crochet method, then use very sharp scissors to cut your cardigan open up the centre!!! It deserves three exclamation points due to its being so empowering. You just cut up your fingering weight sweater, so now it is time to flex.
For the bands, pick up about 2 stitches for every three rows, ending with a multiple of 4+2. Increase or decrease on the first row if necessary to get a multiple of 4+2. Be sure you’re picking up between the steek stitch and the body stitch on both sides of the cardigan so that the extra steek stitches fold under. Work the bands in 2x2 rib, beginning and ending RS rows with k2.
For the button band, just work in ribbing until it’s about 1”/2.5 cm and bind off in pattern.
For the button hole band, work about half your rows of ribbing. We’ll work the buttonholes on the next RS row. Here are my standard buttonhole instructions:
Setup for Buttonholes:
Before working next row, place removable stitch markers on needle to mark where buttonholes will be worked.
Place removable markers 4 stitches from bottom hem and 6 sts from top neck edge. Place another marker at the halfway point between these markers, then place two additional markers, centring them between the makers already placed so that there are 5 evenly spaced markers.
Buttonhole Row (RS): *Work in established rib pattern to m, remove m, sl 2 purl wise leaving yarn in back, pass 1st st over 2nd st, sl 1 purlwise, psso, slip st from right needle back to left needle, turn, bring yarn to back and cable CO3, turn, bring yarn to back, sl 1 purl wise, pass last CO st over slipped st; repeat from * for each buttonhole, work in established rib pattern to end
Continue working in 2x2 rib until you’ve worked the same number of rows you worked for the other band and bind off in pattern.
These buttonholes are small, about the size to suit 1/2”/14 mm buttons. Sew buttons to button band, matching placement to buttonhole band.
And one more thing:
Finish Cut Steek Edges
This step is optional. For machine-sewn steek reinforcements, it’s helpful for extra security and to cover any visible sewn stitches. For the crochet reinforcement method, it’s less necessary as the edges are neater. I didn’t bother with my sweater even though I used the sewing machine method, but I may do it later after I’ve gotten my buttons.
Finish both cut edges as follows:
Cut grosgrain ribbon about 1 in/2.5 cm longer than your cardigan Front. Fold top and bottom of ribbons about .5 in/1.5 cm under to prevent fraying of the ends and pin ribbon down, covering the cut steek stitches. Whip stitch ribbon all the way around so that it is secured to inside of Fronts and covers the cut steek stitches.
Steam bands and edges or wet block again.
That’s it! Here’s a video with detailed instructions about reinforcing and cutting your steek with a sewing machine and here’s a video on using the crochet method.
In case any of you sewists out there are wondering, my dress is a hack of the Kila Tank from Allie Olson, which is basically my go-to tank top (I think I’ve made five?), and the fabric is the absolutely most spectacular lightweight modal rib knit from Blackbird and I want to just have it on my body all the time.
Oh, and here’s a link to the original Dissent pattern, which is a worsted weight cardigan. Both sweaters were inspired by American Supreme Court Justice Ruth Bader Ginsburg’s collar/jabot she wears to read dissenting opinions.


